Belated Merry Christmas (and early happy New Year!)!
I have a sister-in-law with a great sense of humor. She's a fan of this link, and I thought I'd share it with you all. There are thousands of hilarious pictures- brows around a bit :) I'm sure we all have a few we could add.
Hopefully a more house project-ish post will follow tomorrow. Between Christmas, cooking, and a bad cold, this blog has been a tad neglected. Yikes!

December 30, 2010
December 13, 2010
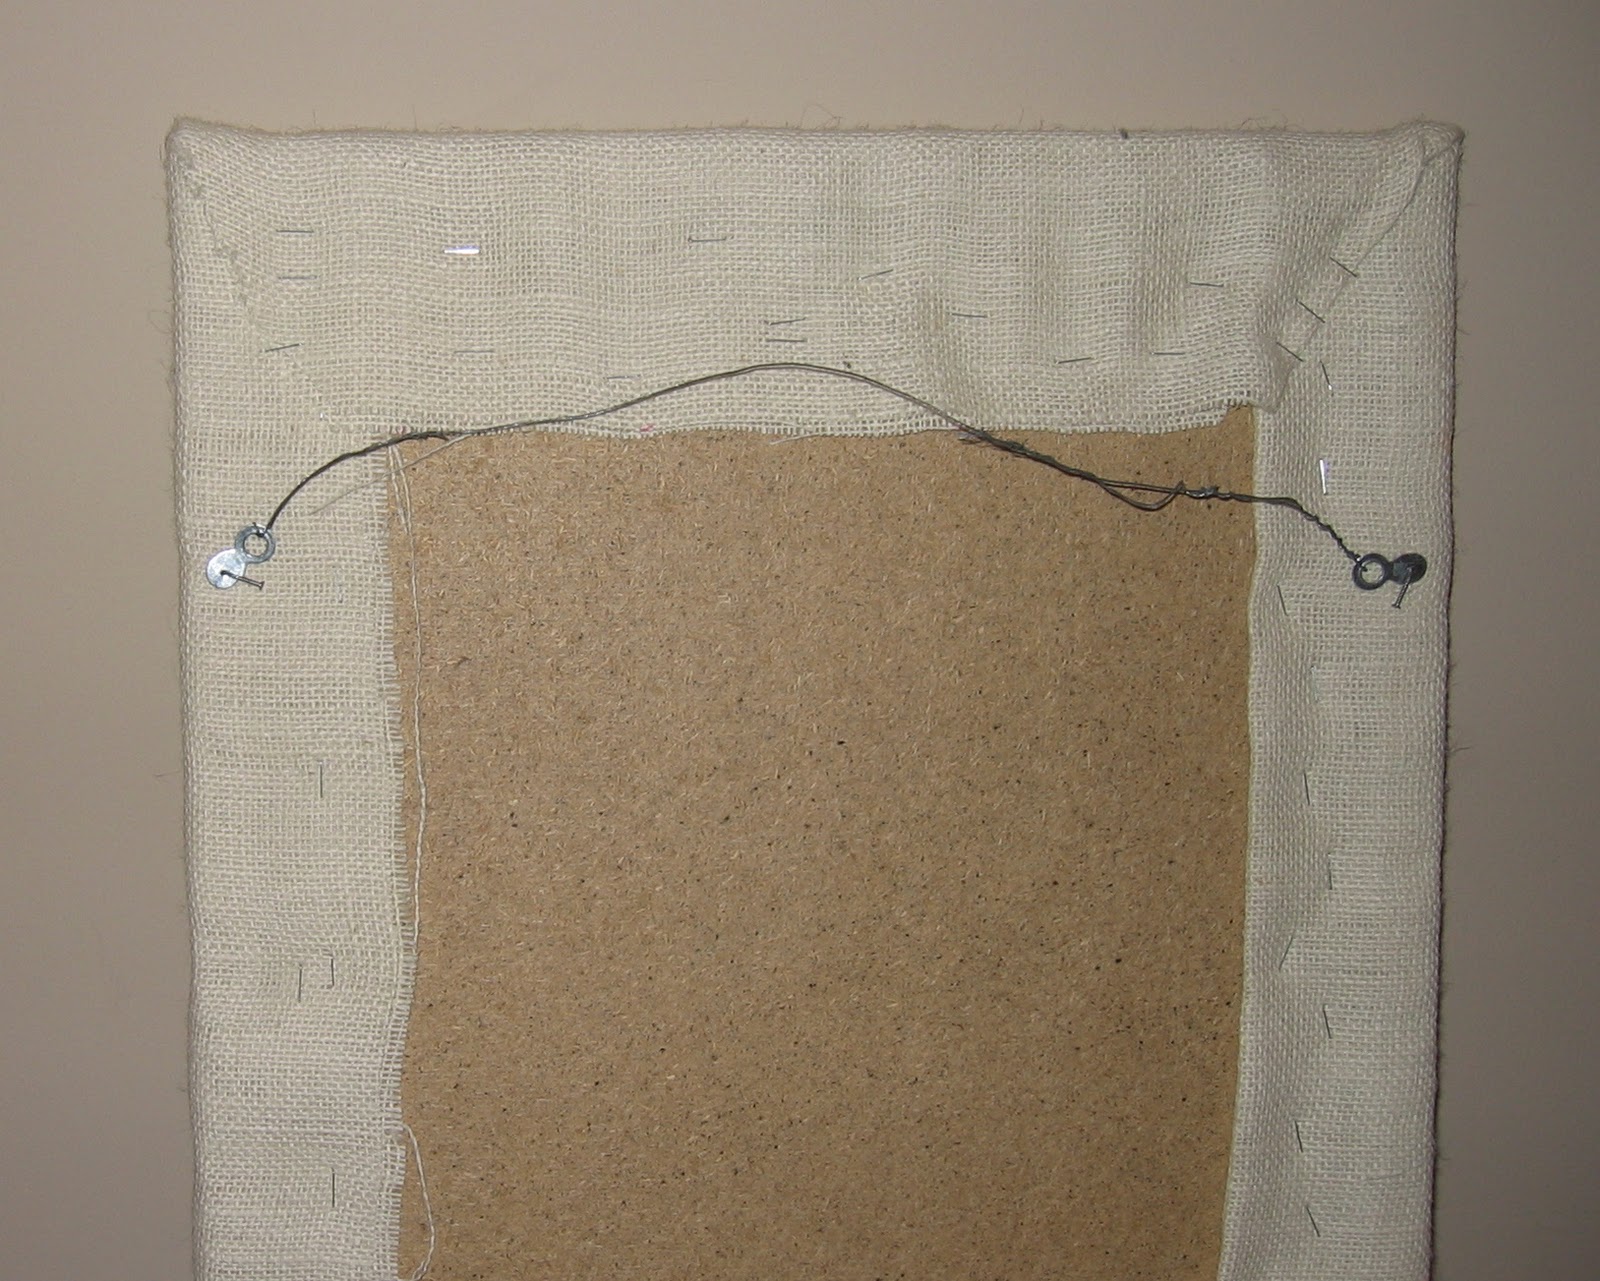
Burlap Bulletin Board

I've been seeing these burlap bulletin boards all over blogdom recently, and wanted to give one a try. It's currently hanging at the bottom of our stairs, but I'm thinking it'd look better in the office. This project is so easy. If you can staple, then you're set. Here's what you need:
- Bulletin board
- 1-2 yards of burlap (I used two, since the burlap's weave was so loose you could see through only one layer)
- Stapler
Lay the board face down in the center of the fabric. Fold each edge over, pull taught, and staple. And keep stapling. I actually used a regular staples, not a gun, since the back of my board was cork. That's it! So easy.

I love Pottery Barn's use of a bulletin board as an Advent calendar (there's uses linen):

Happy decorating!
December 11, 2010
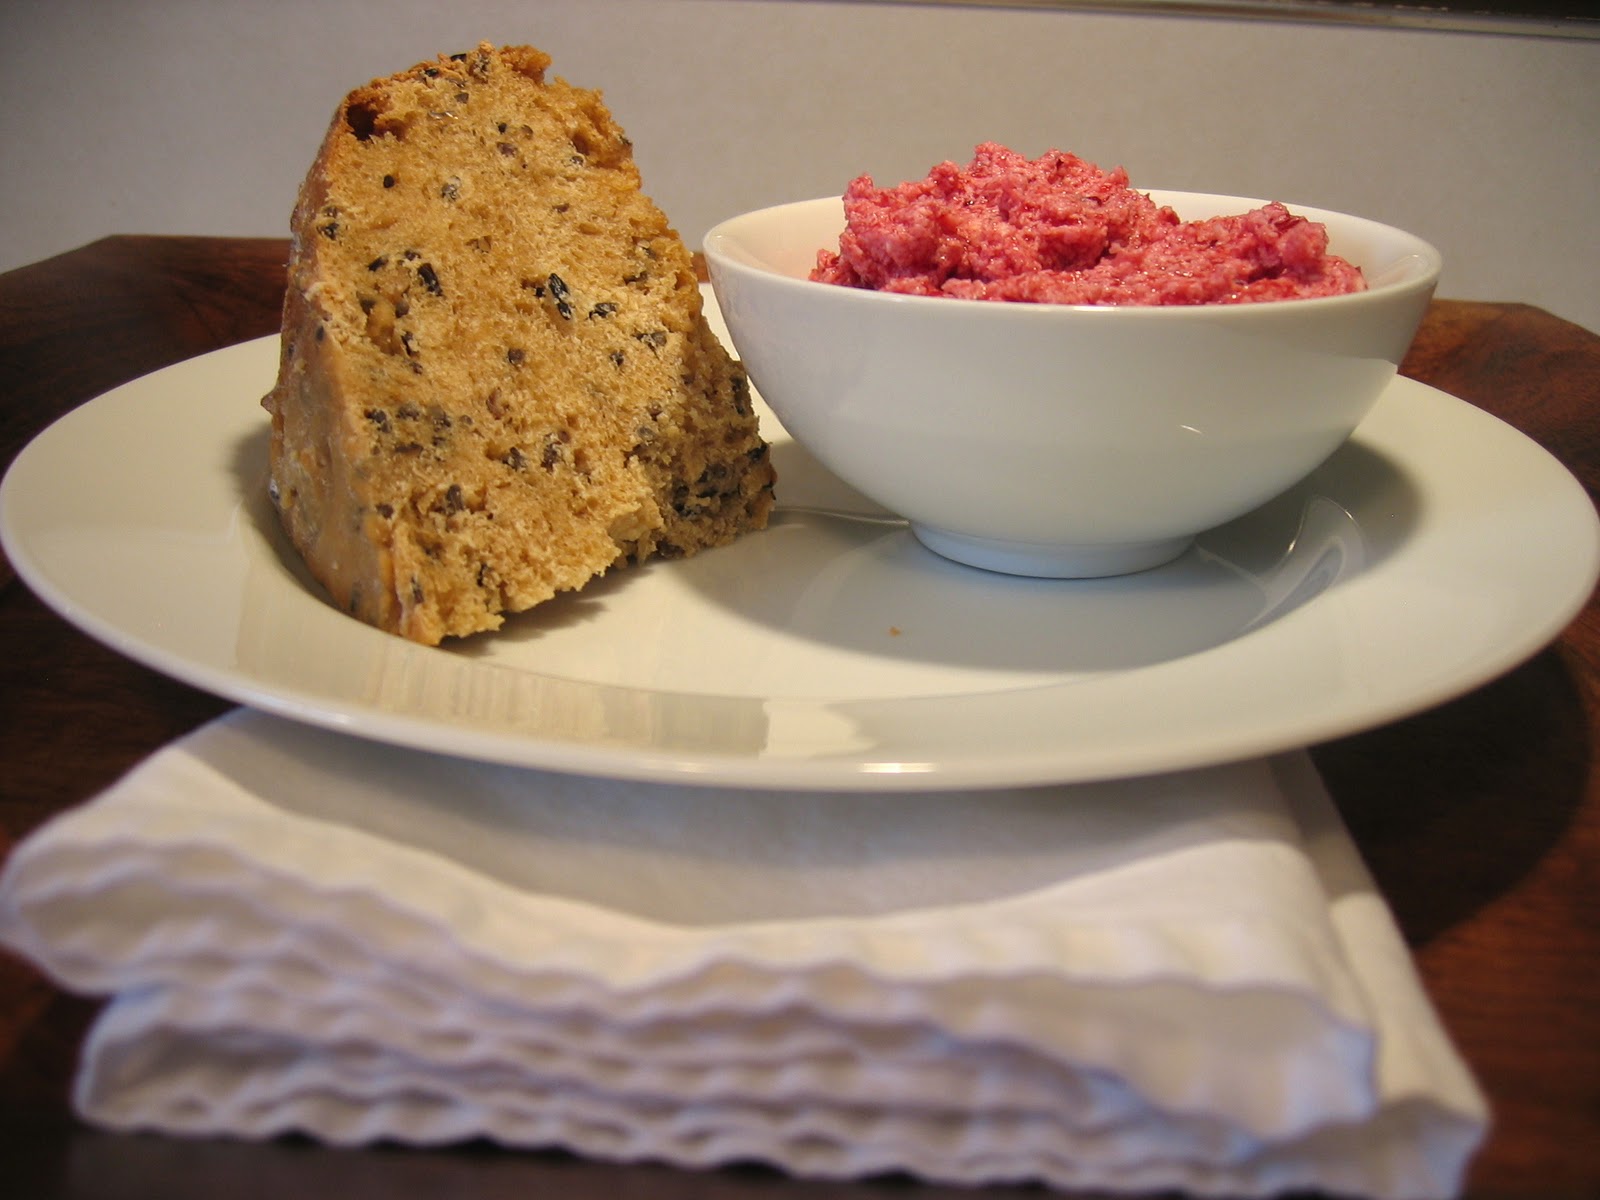
Wild Rice Bread with Whipped Almond Cranberry Butter

I realize this isn't decorating related. But food is just as exciting as decorating, so I suppose it's okay :) To celebrate our first anniversary this summer, my husband and I spend a long weekend at Larsmont Cottages on the North Shore. They've got this fabulous restaurant connected to it called The Ledge Rock Grille- I'd highly recommend it! Anyway, before the meal, our server brought out bread- wild rice bread with lingonberry butter. YUM! I found these two recipes online and tweaked them to my liking. Here they are:
Wild Rice Bread
- 3/4 tsp active dry yeast
- 1 cup + 2 tbsp warm water
- 2 tbsp sugar, divided
- 2 tbsp molasses
- 2 tbsp vegetable oil
- 1 1/2 tsp salt
- 1/2 cups cooked wild rice
- 3 1/2 cups flour

Whipped Almond Cranberry Butter
- 1 stick butter, ( at room temperature)
- 1/4 cup canned cranberries
- dash almond extract

Hah, looks a bit like raw ground beef- I promise you it's not.
I'm not a big "butter on bread" type of girl, but I must admit I've been slathering my wild rice bread with this butter concoction. Since it's mixed with fruit, it must not be THAT bad for me... right? :)
Recipe credits: wild rice bread, cranberry butter
December 6, 2010
Christmas (Tree) Leftovers

And I don't mean food- however, it's great too. We picked out and set up our Christmas tree on Saturday afternoon, and my husband sawed off the bottom few branches so that the tree could fit into our stand. Before he could throw them in the trash, I whisked them away to turn into more Christmas decor. What do you think?


I promise that this is the same bathroom- isn't it weird how wonky flash can make a paint color look?


There's still a couple of branches left in the garage. I'm thinking I might attempt to make my own wreath- we'll see
November 30, 2010
Easy Christmas Decor Ideas

The Christmas season has officially arrived at our house. I thought I'd share a few quick (and inexpensive) decor ideas with you all. The first are these lovely footed hurricanes. Aren't they cute? I can't take credit from the idea, I've seen pictures of them posted all over DIY blogs. They cost $2.00 a piece. Yes, that is correct, $2.00! I made three for a whopping six bucks :) I found the vase and candle stick stem at my local dollar store, and just hot glued them together. How easy is that? Here's the whole centerpiece:

Recognize my burlap table runner from the previous post? My mom bought me the garland from a florist shop on sale after Christmas. I LOVE it- it's so realistic looking.
This year, I was also inspired to decorate using silver and gold ornaments after reading this link from Bower Power. I need to


Why yes, I do have ornaments on top of our toilet. Another plug for the dollar store- buy your ornaments there! I bought a couple boxes of silver and gold ones for a dollar a piece (obviously:) .
On another note, Leo struck again:
Grrrrr. This post could also be titled "Pre-Patch Job #2."
Enjoy inexpensively decorating for Christmas!
November 19, 2010
A little styling tip...

Our nightstands have, unfortunately, been neglected since we purchased them last January. Not in the sense of care and cleaning, but in the sense of decor. As type A as I am when it comes to having things look "just so", for whatever reason our bedroom has been a tad bit overlooked. (We've still got frames hung on the wall with the DEFAULT artwork in them, can you believe it? :) I'm just too indecisive. Anyway, this week I've decided enough is enough, I need to do something about those nightstands. There's been an odd mishmash of frames, stacked books, etc. sitting there looking forlorn for too long. Ugg.
I spent 30 minutes or so browsing through the Pottery Barn website this afternoon soaking in nightstand decor styling tips. I went from having no real idea of what I wanted to do with our nightstand to have too MANY ideas of what might look great! Some details from my preliminary pass:


So here's my tip: if you're looking for decor inspiration, find the corresponding "section" of the PB website and start browsing. I searched through almost all of the pictures of nightstands that they've got on the website, not looking at the nightstand itself, but what was on top of it. How do they place their bedside lamp? How many picture frames are on top? Are there any unusual items that could look neat on a nightstand that I'm not thinking of? Are there any connecting themes to this decor? If you want living room inspiration, look at their couches or coffee tables. If you need a kitchen color scheme, look up kitchen tables. You get my drift.
Those PB stylists are just so talented, we could all use a few pointers from them :) Happy styling!
November 13, 2010
Burlap Table Runner

Hi All- it's looking like Christmas up in my neck of the woods this morning with all of the snow. I was immediately inspired to bust out the Christmas garland and replace my pumpkin spice candles with pine bough scented ones, but it's still almost two weeks til Thanksgiving. "Drat", I thought, as Toad would say. So in the spirit of
As most of my ideas go, I saw this table runner at Pottery Barn and LOVED it. But didn't love it enough to pay $30 for it. Really that's not spendy, I know, but I error on the cheap side when it comes to decorating- especially accessorizing. I figured I could make a similar looking one for a lot less. Here's the original:

Cute, huh? I still haven't gotten around to making second runner that goes below the burlap one, but all in due time. Here's what you need:
- Burlap (I used 3 yards to make a 90" runner, but you can custom yours to whatever length you need to fit your table)
- Sewing glue (like Unique Stitch or Stitch Witchery)
- An iron

I actually had planned on sewing the hem around the edges, but it wouldn't have held. Glue was a lot quicker, and worked better anyway. This project cost me a grand total of $4.50. The burlap was $3 per yard and I had a 50% off coupon. The greatest thing about this runner is it's versatile with any season of decor- who doesn't love some great, nubby textured burlap? :)
October 22, 2010
Dining Room Shelf/Buffet

I've been looking for a buffet to go in our dining room for almost a year. The only problem is, our dining room isn't the biggest, and I realized that when we put the leaf in our table, a buffet would no longer fit. Bummer! On to Plan B. To be completely honest, the only reason I wanted a buffet was to be able to display some of the beautiful dishes we received as wedding gifts. It seemed a shame to have them tucked away in our kitchen. That's when I came up with this idea:

Now I have display space and still have room to pull out the table when we've got company. I love it! Our shelf is called "Lack" from Ikea. It was only $30. At first I was a bit nervous that we'd hear the crashing of dishes during the night and the shelf would pull out of the wall, but so far so good. I love the look of adding decorative wooden brackets and will feel more comfortable displaying heavier items once we find the right color stain for them.

All you you need for the project besides the shelf is a drill. Really, that's it. And maybe a handy husband :) I realize it's not yet Halloween, but I'm already excited to come up with a Christmas display for this spot. Happy decorating!
October 21, 2010
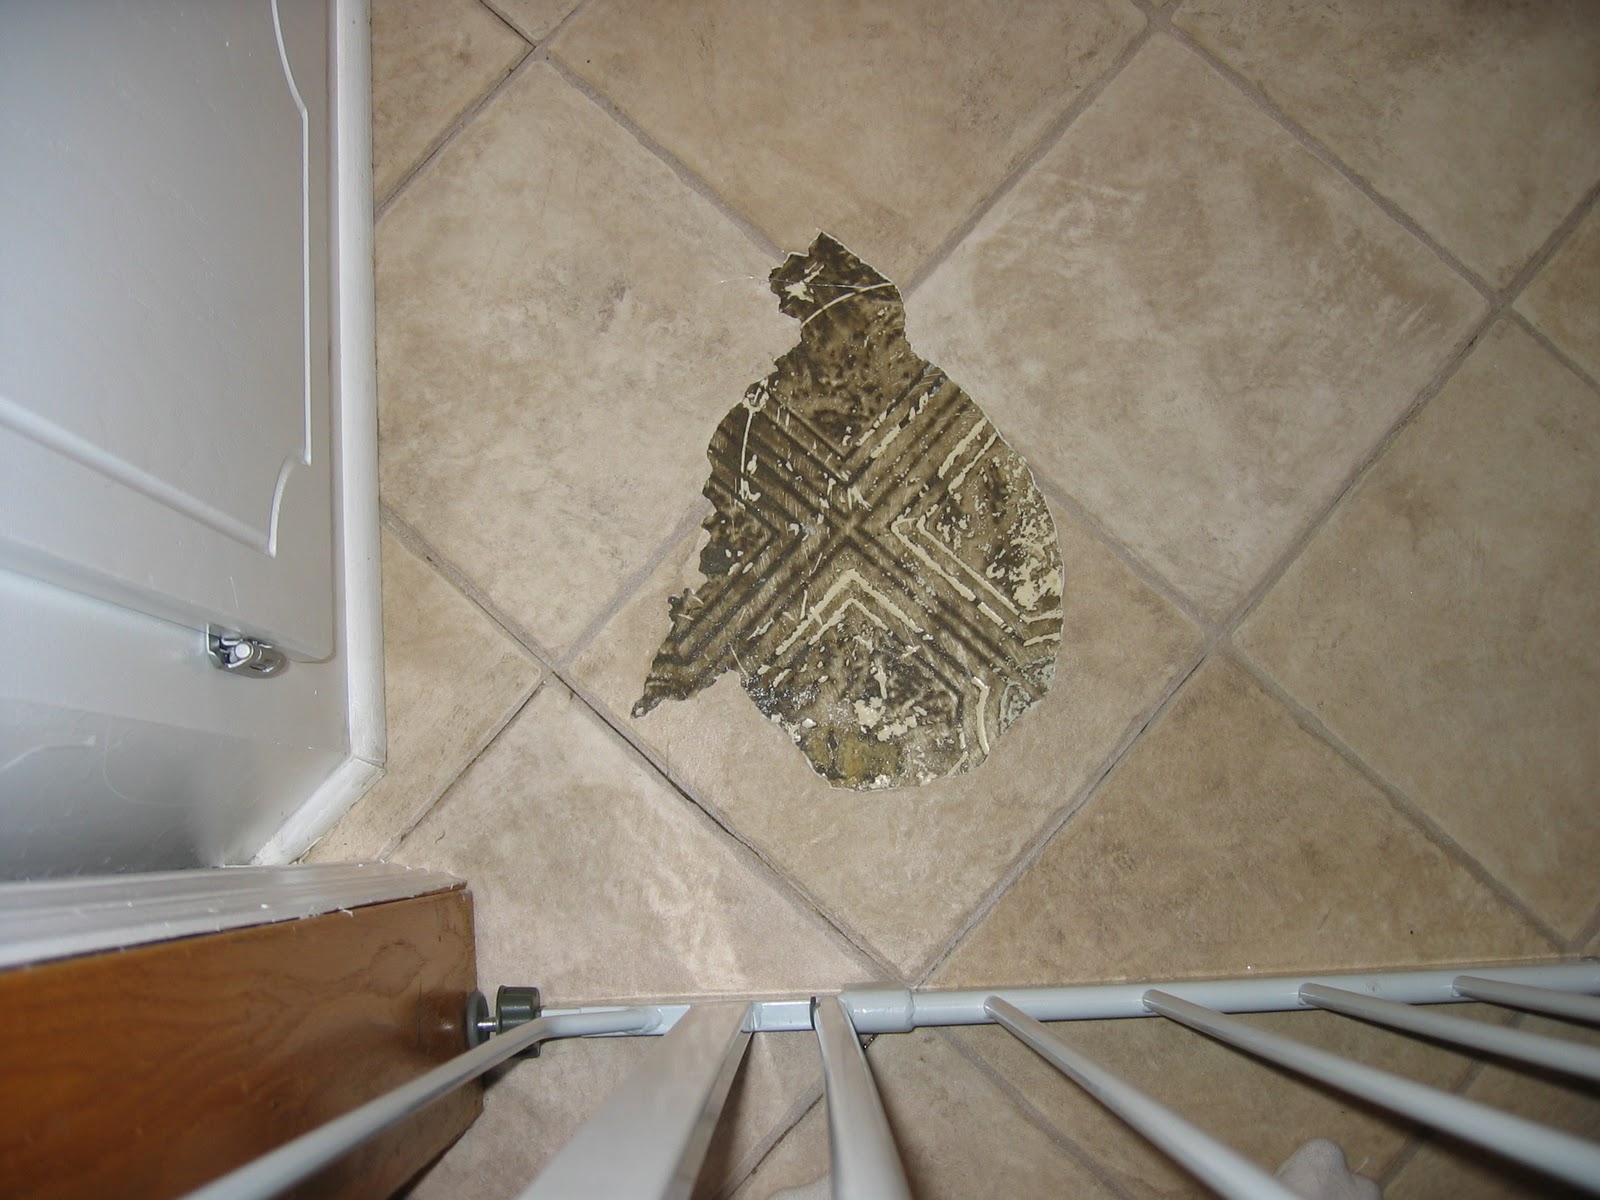
Not So Fun House Project
We have a sweet little puppy named Leo. Since he is mostly good, and because we try to be good puppy parents, we decided that Leo could go in our gated kitchen on the days that both my husband and I work. He did great the first two weeks. On Tuesday evening, this is what my husband came home to:


Can you believe that our sweet little boy could do something like this?

Fortunately, the old homeowners left us some extra flooring materials. So our current, un-planned for, un-fun house project is now a flooring patch job. Good thing Leo's cute.
October 17, 2010
Good Enough
While blog hopping this afternoon, I ran across this posting from a blog called The Inspired Room. It's such a good reminder of priorities and not to turn good things (even budget decorating!) into an idol and a time hog. Which I can have tendencies to do sometimes- ugg! Here's a teaser:
"How long could we be content with what we have right now? When I declare to myself that I am in a “good enough” season, it helps me to refocus my eyes off of ME and MY OWN WORLD. When I really enjoy something, like working on my home or even something like blogging, it is easy for it to become an obsession and a self-absorbed addiction. And that is just not a good thing for me. I need to find balance for my own health and well-being, as well as for that of my family. I need to step away sometimes. When I am in a 'good enough season,' I am freed up all the more to open my home to others and volunteer my time for other things. If I fill up my free time being outwardly focused, I have less free time to obsess over details of my own house. A 'good enough season' keeps me from falling into the trap of perfectionism and helps me remember that I already have all the blessings I need."Read the whole thing though, it's helpful and refreshing. Check it out!
October 3, 2010
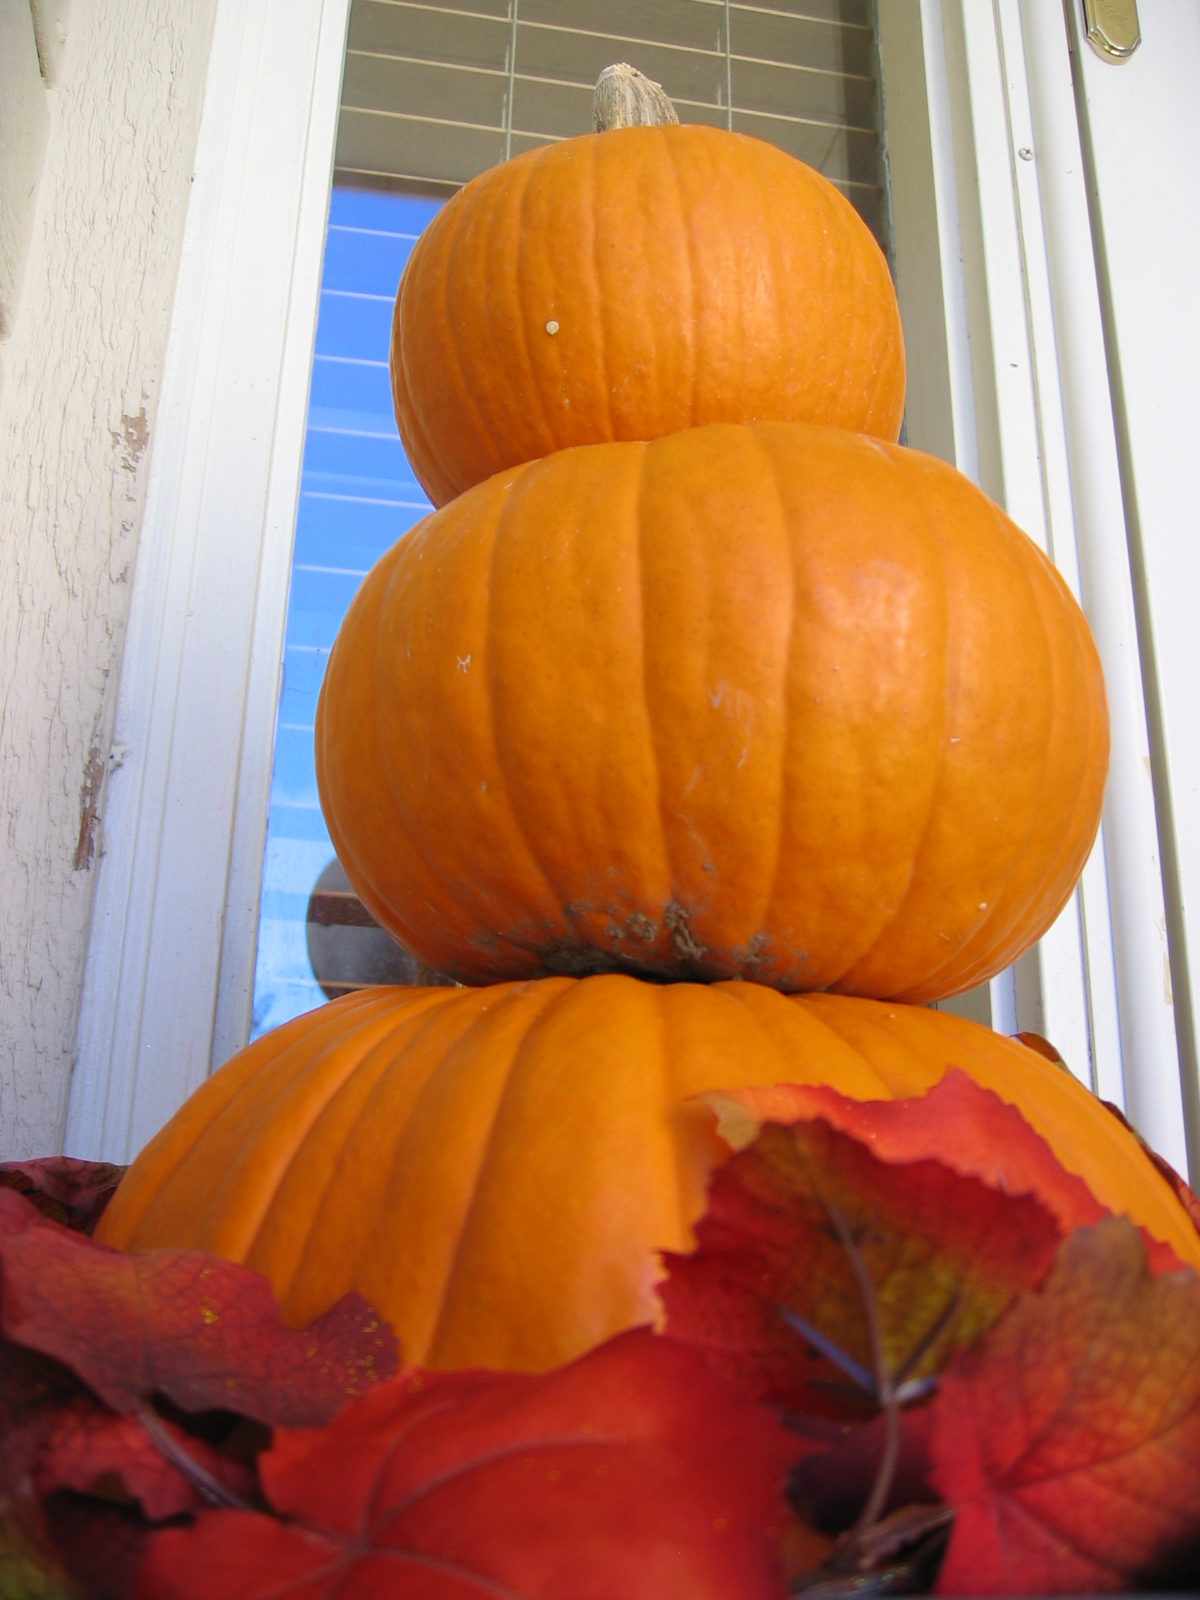
Pumpkin Topiary
Happy October! I've completed another pumpkin project: a pumpkin topiary! This one's cheap and easy, too.

Can you see Leo checking out the topiary? :) Here's what you need:
duck tape dark gray, I filled it with and old bed sheet (yes, an old bed sheet, I'll admit it) and wound the leaf garland around the inside of the urn. In my case, the opening of the urn was bigger than the bottom pumpkin, and I needed something to cover up the bed sheet. Plus, even if you don't need any coverage, I think the garland is cute and whimsical. Then I sawed off the stem and plunked in the first pumpkin. Depending on the size of your urn, you may or may not need anything to fill in the bottom in order to lift up the bottom pumpkin. An old sheet worked well because I could wad it up to fit the contours of the bottom pumpkin so I could rotate it to get the flattest part facing up. This helped the other pumpkins balance well on top.


After getting the bottom pumpkin situated, saw off the second pumpkin's stem and add it to the topiary. Top it off with the smallest pumpkin and you're done!

Here's few other pumpkin topiary pictures that I used for inspiration:


Can you see Leo checking out the topiary? :) Here's what you need:
- A couple of pumpkins in varying sizes. I found a big, medium, and small pumpkin. Look for ones that are "flat" on top, or have more of an oval shape as opposed to round. They'll stack and balance better.
- Some type of outdoor urn (or basket or flower pot). Mine was hunter green, so I spray painted it gray. I think I'm going to respray it, as "dark gray" turned out to be shinier and lighter than I was going for (anyone think it resembles duck tape? :)
- Leave garland
- Serrated knife or small saw
Here's a close up of the garland. Aren't the berries cute? FYI: As well a mild pumpkin fixation, I'm also finding I'm drawn to berries.


Here's few other pumpkin topiary pictures that I used for inspiration:


I love the idea of carving the pumpkins (especially like in the second picture!) but wanted mine to last for a while. Once cut, the pumpkins seem to shrivel up and die within a week or so.
September 29, 2010
Metalic Pumpkins

I absolutely love fall- the leaves turning, bonfires, a back to school mindset, taking out sweaters, jackets, and closed toe footwear, baking things with ingredients including pumpkin, apples, cinnamon, and nutmeg, and about 300 other things. Isn't it great that we get to decorate for a season? I suppose you can decorate for spring, summer, and winter (Christmas decor is separate!), but the fall months are the only ones that bring seasonal decor to our home. This year I've been mildly fixated on pumpkins. They're just so quintessentially fall. However, not that you have to be all matchy matchy, but we have no orange in our house and a lot of brown, green, and white. I kept the orange pumpkins mostly outside, and spray painted some mini ones for my kitchen table decor. I love the look! I completed this quick project for about $8. Here's what you need:
- mini pumpkins
- spray paint
- painters tape

Aren't they cute? I've seen all kinds of other pumpkin painting ideas: spraying them with chalkboard paint and writing messages on them in chalk, spraying them white and then drawing on henna-ish/lace designs with a black sharpie, leaving them orange and spaying them with a glaze spray, etc. I love these metallic ones because their coloring will be appropriate through Thanksgiving. Phew. Now my kitchen decor is in the clear until Christmas.

September 28, 2010
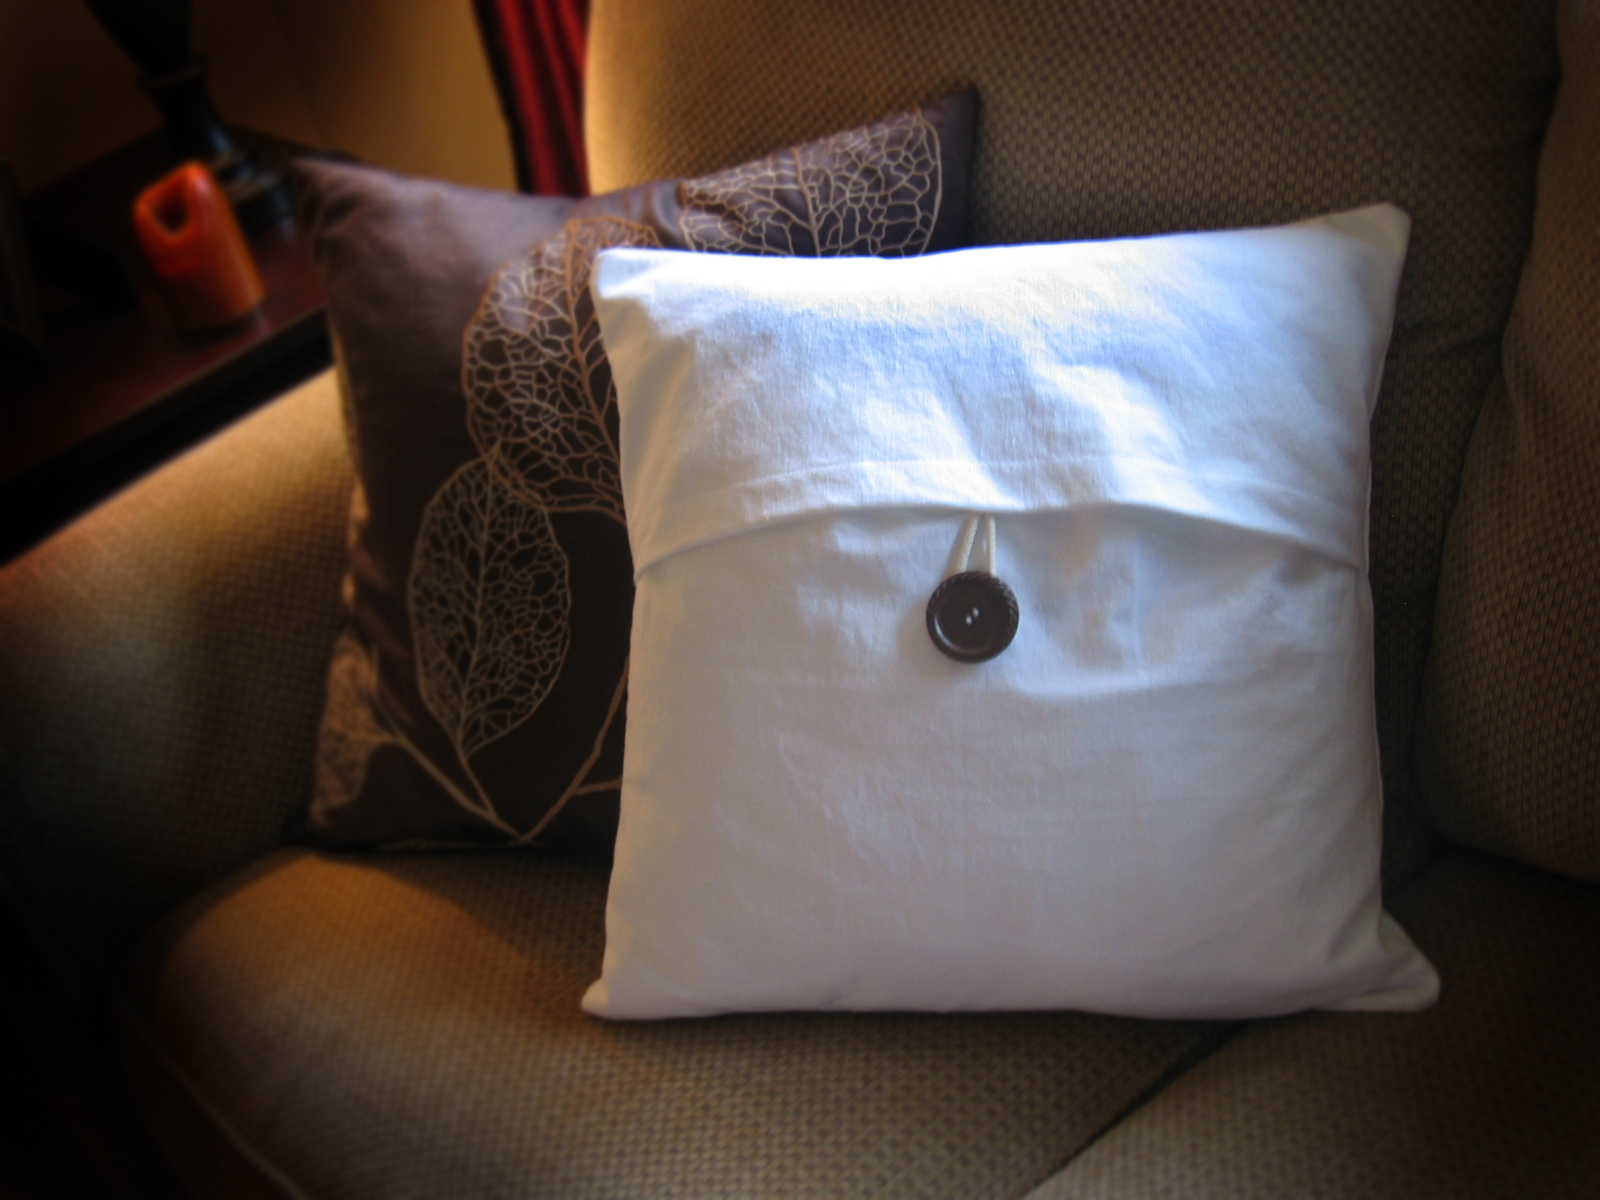
Simple Pillow Cover
- 1 yard of fabric (I used duck cloth- I wanted something with a linen texture, but wasn’t able to find linen thick enough. Also, my fabric was 60″ wide)
- 6 – 8″ of fabric cord or thin roping
- 1 large button
- needle and white thread
- 18″ pillow insert

Lay the 19 x 19 pieces down first. Fold the 19 x 18 pieces in half (its new dimensions are 19 x 9). Lay this piece on top of the square so that the fold is in the middle of the pillow running horizontally and so that it’s top two corners match up with the first layer’s top corners. Lay the 19 x 13 pieces on top of this matching bottom corners to bottom corners. Fold down a 1/2 inch flap on the top piece (19 x 13) and pin into places. Then pin together all sides of the pillow.

Here’s a closer shot of the flap and layers:

Cut the cord to your desired length. Mine was 6 inches. Using a needle and thread, sew the two ends of the cord together.

Measure to find the middle of the flap on the 19 x 9 piece. Here, sew the loop a 1/2 inch above the bottom of the flap. VERY IMPORTANT: Do not sew the loop to both layers of the flap! Sew it only to the top layer! If you sew the loop to both flaps, you’ll be able to see all of the stitches on the finished side of the pillow. Sew a straight horizontal line 1″ above the fold. This is optional, I like how it looks, but you can skip this step if you want. It’s time to sew the pieces to gether. Make sure that you have the three layers lined up correctly. The 19 x 19 pieces down first, topped with the now 19 x 9 flap piece, topped with the 19 x 13 piece (the loop will now be covered by the top piece). Sew around the entire perimeter of the pillow with 1/2″ seam. Here’s what it should look like:


Put the pillow insert into the pillow cover, and then sew the button so that the loop fits snugly around it. I found it easier to do it this way because it’s hard to tell exactly where you’ll need the button to be without the insert in. There you have it! Pottery Barn looking pillows for a fraction of the cost. For my project, the buttons were actually the most expensive part of the pillow at $4.50 a piece. Here’s the actual Pottery Barn pillows from our basement…

…. and again, here’s the pillow I made for a fraction of the cost:

Happy sewing!
Subscribe to:
Posts (Atom)